Monday, October 1, 2012

Waiting for Baby...My First Attempt at a Crafting Tutorial

First of all...not MY baby! Been there, done that...this little darling bundle-of-boy-joy to be is my amazing cousin's baby who will be joining the family on Friday. Although she is keeping the name a surprise, we do know it is a boy. Since I LOVE babies...I love to spoil babies!!! My crafting helper, aka my daughter Meridyth, and I went to work on one of our favorite things to make...a Raggy Quilt.

When my oldest son was just a few months old, a family friend stopped by to visit and brought him a handmade blanket/quilt. It was simple and not overly attractive, but the thought behind it was so kind that it is still around here somewhere. The effort that went into making this creation meant so much. It taught me an important lesson about the ease of picking up a gift card versus putting that extra little touch of, "hey...I'm thinking of you..." into gifts we give others.

For years I made a variety of pseudo-quilted blankets. As the mom of a seriously sensory challenged kiddo, I have always made my quilts and blankets with a variety of fabric types, styles and textures. I started with bigger kid sizes but realized how appealing these sensory experiences were to little bitty ones as well.

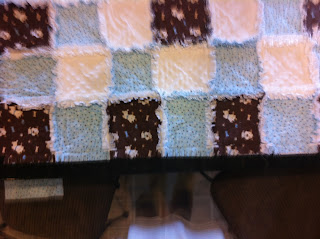
These blankets were all well and good, but I felt like something could be...more. In one of those perfect moments, the mother of a good friend introduced me to what I did not even know I was searching for...the Raggy Quilt! If you have never had the pleasure of experiencing one of these treasures, you are absolutely missing out! Here are a few of our creations...


These blankets have it all...snuggleability, weight, warmth, fidget factor...what more could you want? Oh...wait! They are not terribly difficult to make, they can be done in one day, since I have admitted to a penchant for that and it is something the kids can help with. My youngest helped pick out and piece together a blanket for a teacher who had a baby - it added his personal touch to this gift. Here's why:
 
Raggy Quilts begin by making little "sandwiches" of a layer of fabric (we prefer flannel), a layer of batting (we use 100% cotton), and another layer of fabric (again, we prefer fabric for the bulk of the blanket):


The sandwiches are then put into order based on how you want the finished quilt to look. It is a bit tricky to make sure the front and back both look the way you want, so when the front is done, I flip all sandwiches over to confirm they are in order. A good friend also learned the hard way that taking pictures of the front and back when everything is laid out just in case things get mixed up.


Each sandwich is then sewn with a "X" from about 1/2 inch from each corner. I prefer to use a wavy stitch, but this is a personal preference. I do, however, find it to be a little more forgiving for people like me who are not perfectionists. It is important that you stitch across the sandwich. During one of my first attempts, I thought it would be cute to tack the middle with a cute heart stitch...I quickly learned why these blankets have "X" shapes...the batting balled up in the middle of the sandwich and the blanket was nice and lumpy - cute, but lumpy.
 
Once all the sandwiches are sewn, I then stitch them together one row at a time. Here is the difference between Raggy Quilts and other blankets and quilts - there is no tucking under...the seams come together so the back is flat, but the topside seams are brought together at about 1/2-3/4 inch.


Once the sandwiches are sewn together, then the strips are sewn together in the same way, lining up the seams and, again, allowing 1/2-3/4 inch seams for "ragging".

 
At this point, I run a seam all the way around the perimeter of the quilt. As the seams will not go all the way to the edge, I often run this seam a bit deeper in (3/4 to 1 inch) so that it runs inside each seam.
 
Now comes the fun part (just a hint, this is a great "watching a movie" project as it definitely takes some time)...the snipping! I have tried snipping with a variety of scissors and have found the Fiskers spring-loaded snip scissors (intended for ragging) to be the best. How you snip is up to you, but you want to make sure you snip all the way to the seam, but not through it. There is no absolute width of strips that are snipped, but the more narrow, the more they will "rag" when washed...mine are probably about 1/4 inch.


Now to the washing part...again, I have done this by trial and error....so take my tips for what they are worth:
  1. I learned not to wash a new raggy blanket with anything else, especially towels! They shed!
  2. I wash them the first time on a regular cycle.
  3. I use dryer balls, the bumpy ones, when I dry towels and I have found they work wonders with the raggy blankets as well.
  4. When you dry them, they will shed...LOTS! I stop the dryer every 15-20 minutes and clean out the lint trap.
  5. After the first wash, there will still be some shedding during the next few, but it is minimal and it does eventually stop.
  6. The more times the blankets are washed, the softer they get and the more the ragging turns into more of a chenille.
 
There are more specific directions available as well as books, etc. The size of the squares, the size of the blankets, and so on are all up to you. When I give baby quilts, I almost always give a mini quilt as well, just in case the raggy blanket becomes the favorite blankie...then the larger size does not have to go everywhere.
 
Happy quilting!!!
 

Manic Monday

I am slowly but surely rejoining the land of the living after nearly a week of battling an upper respiratory infection. I do not sit still very well and, unfortunately, most of the crafting I do is not contained to things that can be done while attempting to hold up the couch...especially with a craft show coming up this weekend and getting my creativity on to create some amazing custom products for Scatter Creek Winery in Tenino, Washington.

I did pull out some fall fragrances this weekend. Although I do not tend to be a huge fan of pumpkin scents and the various cinnamon spice-esque fragrances most people are drawn to this time of year, I will admit that batches of of Pumpkin Spice and Chai Tea Scrubbing Sugar Cubes did a pretty good job of putting me in a pull-out-the-sweaters kind of mood.

What's that you ask? What are Scrubbing Sugar Cubes? In addition to my new favorite soaping project, they are, quite simply, just a little bundle of fun! Take your favorite scrub, a shot of awesomely moisturizing soap, and a drizzle of nourishing oil and pack it all in one little colorful drop or cube of goodness.

These little darlings greatly reduce the slippy factor in the shower and you grab one or two before showering so water isn't introduced to the jar as it is when you dip your hands in a jar of your favorite scrub. Last but not least...these travel well! What? What's that you say? Pictures, please?


Have a fabulous Monday! I have to get my creative juices flowing and make up for some lost time.


Friday, September 28, 2012

Following Directions

Over the last few years, I have learned several things about my crafting "style" and accepted a few others. Once I started working within these personal parameters, my little world of crafting became slightly more organized and a lot more fun.

I do not follow directions well. Sometimes I think I'm smarter than the person who started the process, sometimes I'm just lazy, sometimes I think it looks pretty simple and "how hard can it be?", and sometimes I think I have done something similar and should be able to figure it out. More often than not, I'm wrong and I wind up at least referring to the directions at some point along the way.

When I accepted this basic and innate fact about myself, a few things made sense:

  • I can bake, but I prefer to cook. Why? Baking is very precise and it is necessary to measure things whereas cooking, I can toss a little of this and a little of that and tweak and twist someone's idea to make it my own. This is largely what I do in my crafting projects as well, so it makes sense, right?
  • My daughter wanted a dress, I had never made a dress because I did not think I would enjoy sewing clothes, but I'm always up to a good challenge, so I bought a pattern, sewed a dress, and guess what? I didn't enjoy it. I did it, it was cute, but there were way too many rules and directions and if I didn't follow them, it did not work right (yes...I tried to fidget with the pattern...).
  • I do my very best work when a project can be completed in a single day. If absolutely necessary I can stretch it into a second day, but beyond that, forget it! Some of this is probably a mediocre attention span, but much of it has to do with "out of sight, out of mind". If I have to put everything away until the next time I am able to work on a project, when it's time to dig everything back out, I'll start on another project, leaving that project half done. In answer to the question you are asking yourself, yes, I do have a box of half completed projects.
  • There are a lot of really cool things that can be done in a day!


  • When I'm on a crafting roll of any type, it is easier for me to multi-task and make one big old mess that I have to clean up once.
  • I have a workshop in the basement, but I feel awfully isolated when I work down there, so I tend to craft in the middle of everything - at the kitchen table. I am working on turning my unused dining room into a craft room, but I have to get it organized enough to make space for my super nifty sewing table my mommy indirectly bought for me last Christmas.
  • I'm kind of a chaotic mess, but I have learned to be ok with that - it's who I am and how I work. The end results usually turn out pretty well, except when they fail miserably...and some of them do!
So...there you have it. Slowly but surely I am going to begin walking through many of my various crafting projects on this blog. I guess my reason for this particular post is to give you a heads-up about what you can expect from me. I will never post about my wonderful decorating ideas and I highly doubt I will have any great organizing tips that will change your life, but I love creating things, I take pride in what I make and, most importantly, I have a lot of fun doing it.

Wednesday, September 26, 2012

CRAFT SHOW SEASON!!!

It is that time of year again...in addition to falling leaves, apple-picking adventures and football games galore, it is Craft Show Season. For the uninitiated, it may just seem like they notice more announcements in the local Penny Saver or Community Courier paper than normal...but the reality is, if you are a handcrafter or a direct sales representative, pull out your checkbook, calendar and pen...it is a race for the first spots, the best spots, the only spots in some shows...Ready, Set...OH!

What to take? What to make?

My first craft show was nearly eleven years ago...and it was a complete fluke. A dear friend introduced me to the wonders of handcrafted bath and body products and, as a person with little to no self-control, ordered enough stuff to stuff family stockings for at least a decade. As a side note, it was this little adventure that was the inspiration for Harmony Bath and Body...but that is a story for another day.

In the process of experimenting with this and that, our friends and family were guinea pigs in the first degree. The difference between these products and other attempts at arts and crafts (remember...I'm crafty, not artistic), was that these very same people came back asking to buy more! One of these nearest and dearest mentioned that a fellow teacher was organizing a craft show at a local elementary school and suggested we attempt to peddle our wares. What the heck, right? What the heck was right! We actually sold stuff and made money!!! People actually liked what we made and wanted to pay us for it!


I have come a long way since those early days in knowledge, experience and product selection. It is this very variety that presents me with such challenges around the time school starts: what the heck am I going to focus on this year? What will people be looking for? What can I do that sets me apart from the masses? Decisions, decisions.


It is this very chaos that has my craft room and family room torn apart right now - in a rather ADD-esque fashion, I am jumping from one brainstorm to another. This weekend it was solid sugar scrub cubes, yesterday it was wine charms. I am anxiously awaiting a shipment of new fragrance oils to tease out my soap and sugar scrub inspiration of the season...then there is the blanket I just finished for a certain family member who is expecting a tiny baby boy any day (I think I should wait until she opens the box before I post a pic, don't you?)....

As you browse your local craft shows this season, please take an extra moment to stop by the tables that do not scream, "100,000 other people around the country sell this product too...". We pour our hearts and souls into our creations and are thrilled to share them with you. If you aren't careful, we may actually be willing to tell you all about them and the inspiration behind them.

Happy Crafting...

Thursday, September 6, 2012

To Scrub or Not to Scrub...Almost Everything You Need to Know!

EXFOLIATE! Your skin will thank you!!!

There...I said it. Now the hard part...how to go about it. Hopefully I can help.

I am a Pinterest junkie. I'm sure there is a 12-step group for that somewhere, but I live blissfully with my addiction. I promise that is not as random a comment as it seems and here's why:

If you search exfoliating scrub on Pinterest, Google, or just about anywhere, your head will start to spin. Exfoliate everyday. Exfoliate only on Tuesdays. Exfoliate only your body, never your face. Don't forget to exfoliate your face. Use salt. Use sugar. Use both. Use sand. Use clay. Use citrus. Use avocados (does it go without saying that avocados do not have any scrubbing properties on their own although if you smush them up, they do wonders for your skin in other ways). Use bananas (see avocados). Use ground almonds...unless you have a tree-nut allergy...then do NOT use grounds almonds. Don't use almonds, use ground almond shells. Use oil. Don't use oil. Use oil but don't use that oil....ARGH!!

All that said, do not fret...there is help.

1.  Exfoliation is good.
2.  Nearly everything said above is true in context.
3.  All exfoliants are not created equal.
4.  Yes, you can make your own exfoliant (also known as scrubs) at home.
5.  If you make your own exfoliant at home, it will often be as beneficial to your skin as what you can buy and will frequently be better because it will not have all the other "stuff" in it.
6. Yes, there are advantages to purchasing scrubs...especially if they are made by hand in small batches and do not have the word "Mart" in the manufacturer's name.

Making a basic scrub at home is easier than you think. If you have never used a scrub, practicing at home is a great place to start because it will give you an idea of some of your personal preferences, e.g., fine grain or coarse, salt or sugar, and so on...

Step One: Choose your abrasive ingredient (the exfoliant). Your choice of exfoliant is best determined by what/where you want to scrub. Here are some basic choices:

*  Sugar: I prefer fine grain raw sugar mixed with Sugar in the Raw (a coarser grain raw sugar), but you can use pretty much any sugar. Personally I stay away from brown sugar because of the molasses, but that's just me, there are others who swear by it. Sugar can be used to exfoliate pretty much any area of your body - including your face. It is mildly abrasive but is also a humectant, meaning it will draw moisture to your skin rather than away from it.

*  Salt: If you are using what is in your kitchen, Sea Salt is going to be the most readily available salt. The "grain" of your salt is really a matter of personal preference. The coarser the grain, the "scratchier" the scrub. I do not use table salt as it is processed and does not offer any good "extras" found in Sea Salt and higher end (read as more expensive) varieties. Salt can be drying. Salt is also more abrasive than sugar and should NOT be used on your face but it has great detox benefits on other areas and if your salt has minerals (such as Dead Sea Salt, etc.) it is certainly not a bad thing for your skin.

Step Two: Take an inventory of the oils you have in your pantry. Click here for a fabulous link to non-comedogenic (pore-clogging) oils. This is going to be your best starting point. For a scrub, I highly recommend sticking with the oils that are least likely to clog your pores with the exception of COCONUT OIL. There is some information out there about coconut oil that I find a bit confusing...for a quick coconut oil tutorial, please take a look here.

You can make scrubs with as many or as oils as you like. If you want to truly start with something simple, grab your Olive Oil (aka EVOO) and some sugar or salt  (or even a little of both) to get started.

Step Three: Measure approximately one cup of your chosen exfoliant(s) in a bowl.

Step Four: Add approximately 1/4 cup of your chosen oil(s) to the exfoliant and mix them together. Drizzle oil a little at a time until it gets to the consistency you want. Unlike the first attempts at commercial scrubs, your exfoliant does not need to float in a pool of oil. I prefer to add until the mixture is saturated, but not dripping with oil. Note: the amount of oil you use will vary greatly based on the exfoliant...finer grain exfoliants use more oil, coarser use less...

The first couple of batches you will probably go back and forth by adding a little more exfoliant to offset too much oil and vice versa. There is no right or wrong mixture or texture, but the more you add, the larger the batch....if you don't like what you created, you'll have a lot of it. You can cut these measurements in half...I wanted to start with something that can be easily measured in your kitchen.

Once your scrub is mixed, head over to the sink, scoop out a small amount (a little goes a VERY long way) and give it a whirl on your hands. Some people scrub "dry" then run their hands under warm water to wash away the exfoliant, then pat your hands dry...you want the moisturizing oil(s) to continue to nourish your skin.

As a starting point, that's it! I would be remiss not to mention that if you move your scrub to the shower, be careful!!! The oil in the scrub will make surfaces slippery. If you are scrubbing your feet, I highly advise doing it outside of the shower, perhaps while sitting on the edge of the tub, or even using a foot bath.

A few additional thoughts...the rougher the area, the coarser the scrub you can try if you choose. The more fragile the area, such as your face, the more gentle the scrub (again, never use a salt scrub on your face). From the voice of experience, if you use a salt scrub on your legs after shaving...it will STING! If you are going to exfoliate when shaving, many people prefer to do this before shaving.

Scrubs are best stored in glass. If you store your scrub in glass and decide to scrub in the bath or shower, please scoop out a little into something plastic so you are not taking glass in the bath or shower.

If your scrub separates, just give it a stir before using.

If you give scrubs as gifts, please make sure you include ingredients! Although many believe that nut oils do not hold the same risk as nuts to those with allergies, that is not a decision I choose to make for others...and those I know with nut allergies almost always choose not to risk a reaction when there are other choices to be made such as olive, rice bran, avocado, soybean, etc.

Have fun...and enjoy your blissfully smooth skin! I will follow-up soon with more advanced information...other things you can add...and more!

~Heather

Coconut...Coconut...or Coconut?


As I browse through pins and blogs and this and that, I see more and more references to "coconut oil". The more I read, the more I realized there is a huge piece of information missing in these posts, recipes, etc...defining the type of coconut oil to be used.

There are three main types of coconut oil. As I intend to walk you through recipes, DIY products and more as I develop this blog, I wanted to start off with some solid information about the different types of coconut oils so if you find "coconut oil" mentioned or used in something that peaks your interest, you know where to start.

Coconut Oil (76 or 92): First and foremost, the number refers to the melt point...the temperature where the oil shifts from solid to liquid, or vice versa. This type of coconut oil generally has no odor and is used in kitchen/restaurant fryers, many skin formulations as it is wonderful for dry itchy skin without having a terribly greasy consistency, and is even used in some hair formulations. Coconut oil is also a staple ingredient in real soap (more on this in a future post).

Fractionated Coconut Oil (also called Caprylic/Capric Triglyceride and/or FCO): A light, clear, non-greasy oil that is most frequently used in skin care formulations and is wonderful is massage oils. This is not an oil you will find regularly in your oil shopping adventures as it is not used in cooking or food preparation (at least not that I have ever seen...).

Virgin Coconut Oil (also called Virgin Coconut Cream or VCO): This is the wonder oil that is referenced in most recent recipes, formulations and hints for health and beauty. VCO smells and tastes of coconut. I could go on and on about the wonders of VCO, but one of the best descriptions I have read can be found here. VCO can be purchased in most grocery stores, health food stores and online. For some additional great information, take a look at this.


Hopefully this will help as you browse through various information, recipes, and DIY projects. I will be referencing and using a variety of ingredients in the projects I work on...I will do my best to specify which coconut oil, but please feel free to call me out on it if I forget.

Have a fabulous day...

Heather

Monday, September 3, 2012

Everyone is NOT an Artist...

When I crossed the wicked threshhold that took me to the land of "Over Forty"...I accepted some hard and fast truths about myself. There was something about such a monumental birthday that called for unbridled honesty.

A few of these hard realities were pretty obvious (I'm never going to look like Claudia Schiffer) but others were a little harder to accept (I am just too darn old to audition for American Idol). Bit by bit I have taken inventory of my life as I looked around at where I thought I would be versus where I ended up. My life did not take the path I expected, but I wouldn't change most of it for anything.

Wait...this is supposed to be a crafting post, right? Ok...so here's how crafting stuff fits into all of this:

I spent years trying and failing at attempting to be artistic. Rumor has it that there is an artist inside of everyone - WRONG!!! Not me! Everyone is not an artist...but it does not mean that there is not room for creativity.

Try as I might, it just is not in me...period. That said, bit by bit, I started to find success in crafting...creating things that were functional, and often even fun, but perhaps not so original or inspired as to be considered true works of art. The final part of this realization came even more recently: I am not so great at coming up with original ideas, but I can take inspiration from others and make things that are decidedly my own.

Along the way I have found a little niche or two that work for me...and they even work pretty well most of the time. To make this even more fun, I have been able to craft with my daughter...giving us something to bond over and share.
(my crafting partner)


All that said, there are a few other things I have realized along the way:

1)  When browsing the wares of other artisans and crafters, saying, "I could make that" is dismissive and demeaning to their efforts. Beyond that, if you aren't going to do it, do not say it and support their efforts if it is something you cannot live without.

2)  There are two types of artisans/crafters in the world:

        a) those who engage in their efforts for their own enjoyment and have a "stash" or more crafted items than they will ever be able to use; and,
       b) those who ponder making something wondering who will buy such a finished product.

3)   I decidedly fall into the latter category as is seen by my Etsy shop: Harmony Bath and Body - Home of Scentsitivities Shop. As a result of this, I have also found that it is kind to my friends and family to switch up the crafting on a pretty regular basis...otherwise they wind up with more of this-and-that than they will ever be able to use.

4)  I am not a seamstress, but I can, and do, sew. I sew great straight lines...clothing is something I tried to make and was able to sew, but did not enjoy it. I do not like the precision of following patterns just so any more than I prefer baking to cooking for the same reason.

(note...lots of straight lines)
(you thought I was kidding?)
 

5)  I am not exactly suffering from ADHD, but if I cannot complete a project in one day, the chances are very high that I will not complete the project in a timely fashion, if ever.
(Todays project...not washed yet- but all in a day!)


My intent with this blog is to work through the process of crafting one project at a time with a little bit of my day-to-day chaos thrown in for good measure. I may include the occasional tutorial, but if I am able to ease the struggles of others like me by providing some "been there, done there" tips along the way....hopefully it will make the journey fun for us all.

Away we go...

Heather